Setting up your own personal VPN service on AWS
The initial use case for Virtual Private Networks was to enable remote users to access private networks (eg. a work network) through a secure connection. With internet privacy an increasing concern, people are turning to VPNs as a way to mask their actual location (or make it appear you are actually in another country) and encrypt traffic between you and your VPN server, preventing that data from being sniffed or altered.
Many of the commercial VPN providers like Private Internet Access claim not to keep logs and have other privacy features built-in, however some claim centralized VPN services are a risk as they could be a honeypot of data if accessed by hackers. Another issue with centralized VPNs is that they tend to be used by thousands of users who do all kinds of things like scraping data and spamming that causes their IP ranges to get banned, they trip fraud detection algorithms or impose access limits. Another issue for Brits is that these IPs tend to get banned from BBC iPlayer.
The good news is that setting up your own VPN is incredibly easy and with AWS, you’ll be able to spin up your VPN in one of 18 availability zones around the world. Furthermore if you’re new to AWS, you can take advantage of the Free Tier which includes one year of free service (with a T2.micro instance which is perfect for running a VPN on).
So let’s get started.
First of all head over to the AWS Management Console and create a free account if you’re new.
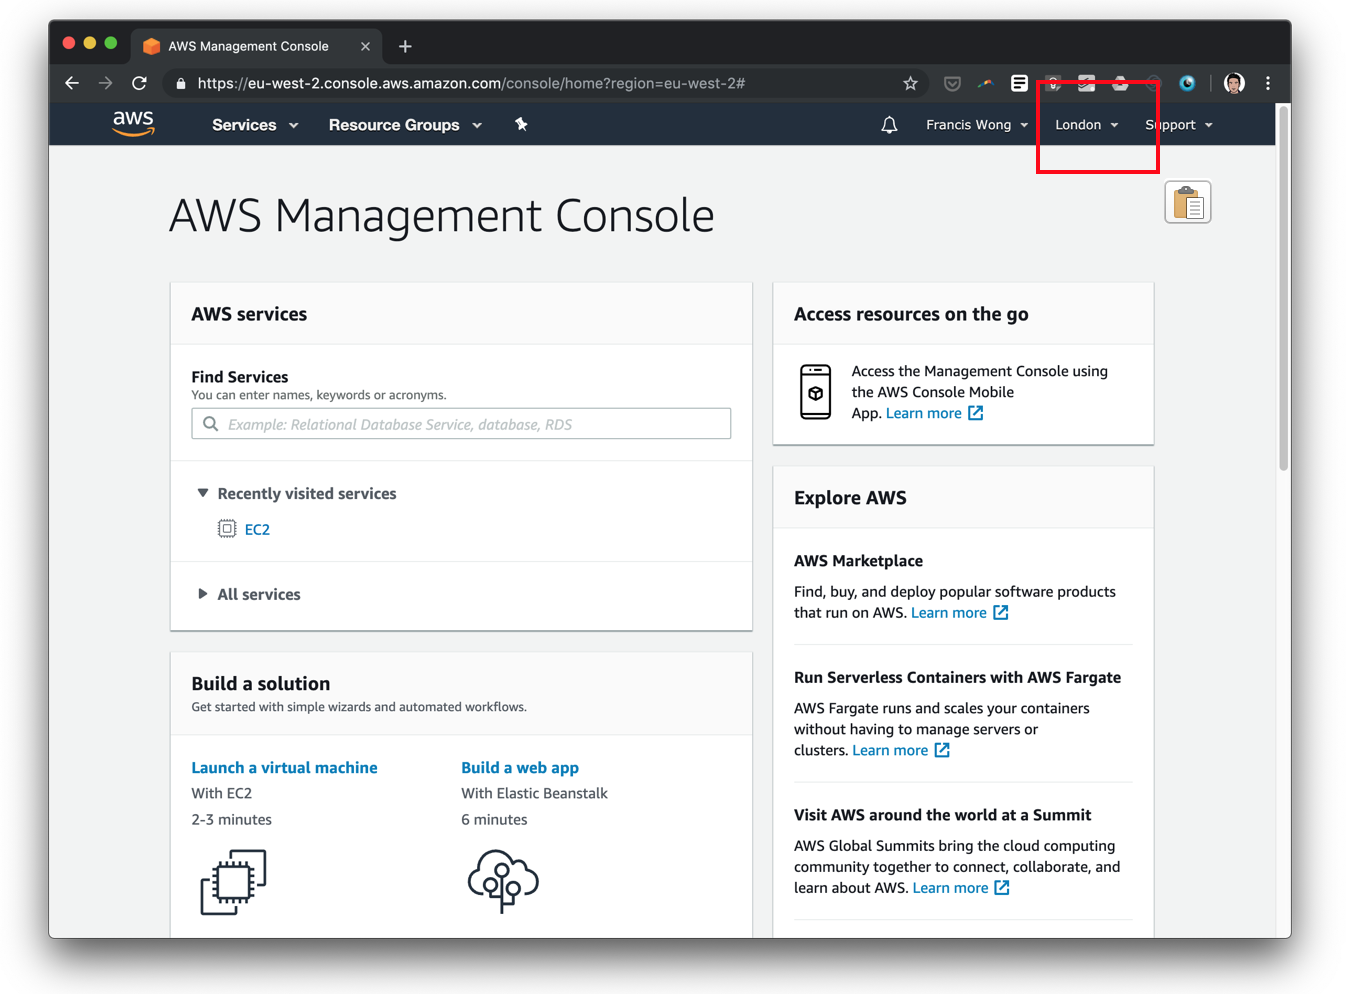
Once you’ve logged in to your AWS Management Console, first select the Availability Zone you want to launch your VPN in. In this example I’ve chosen London:
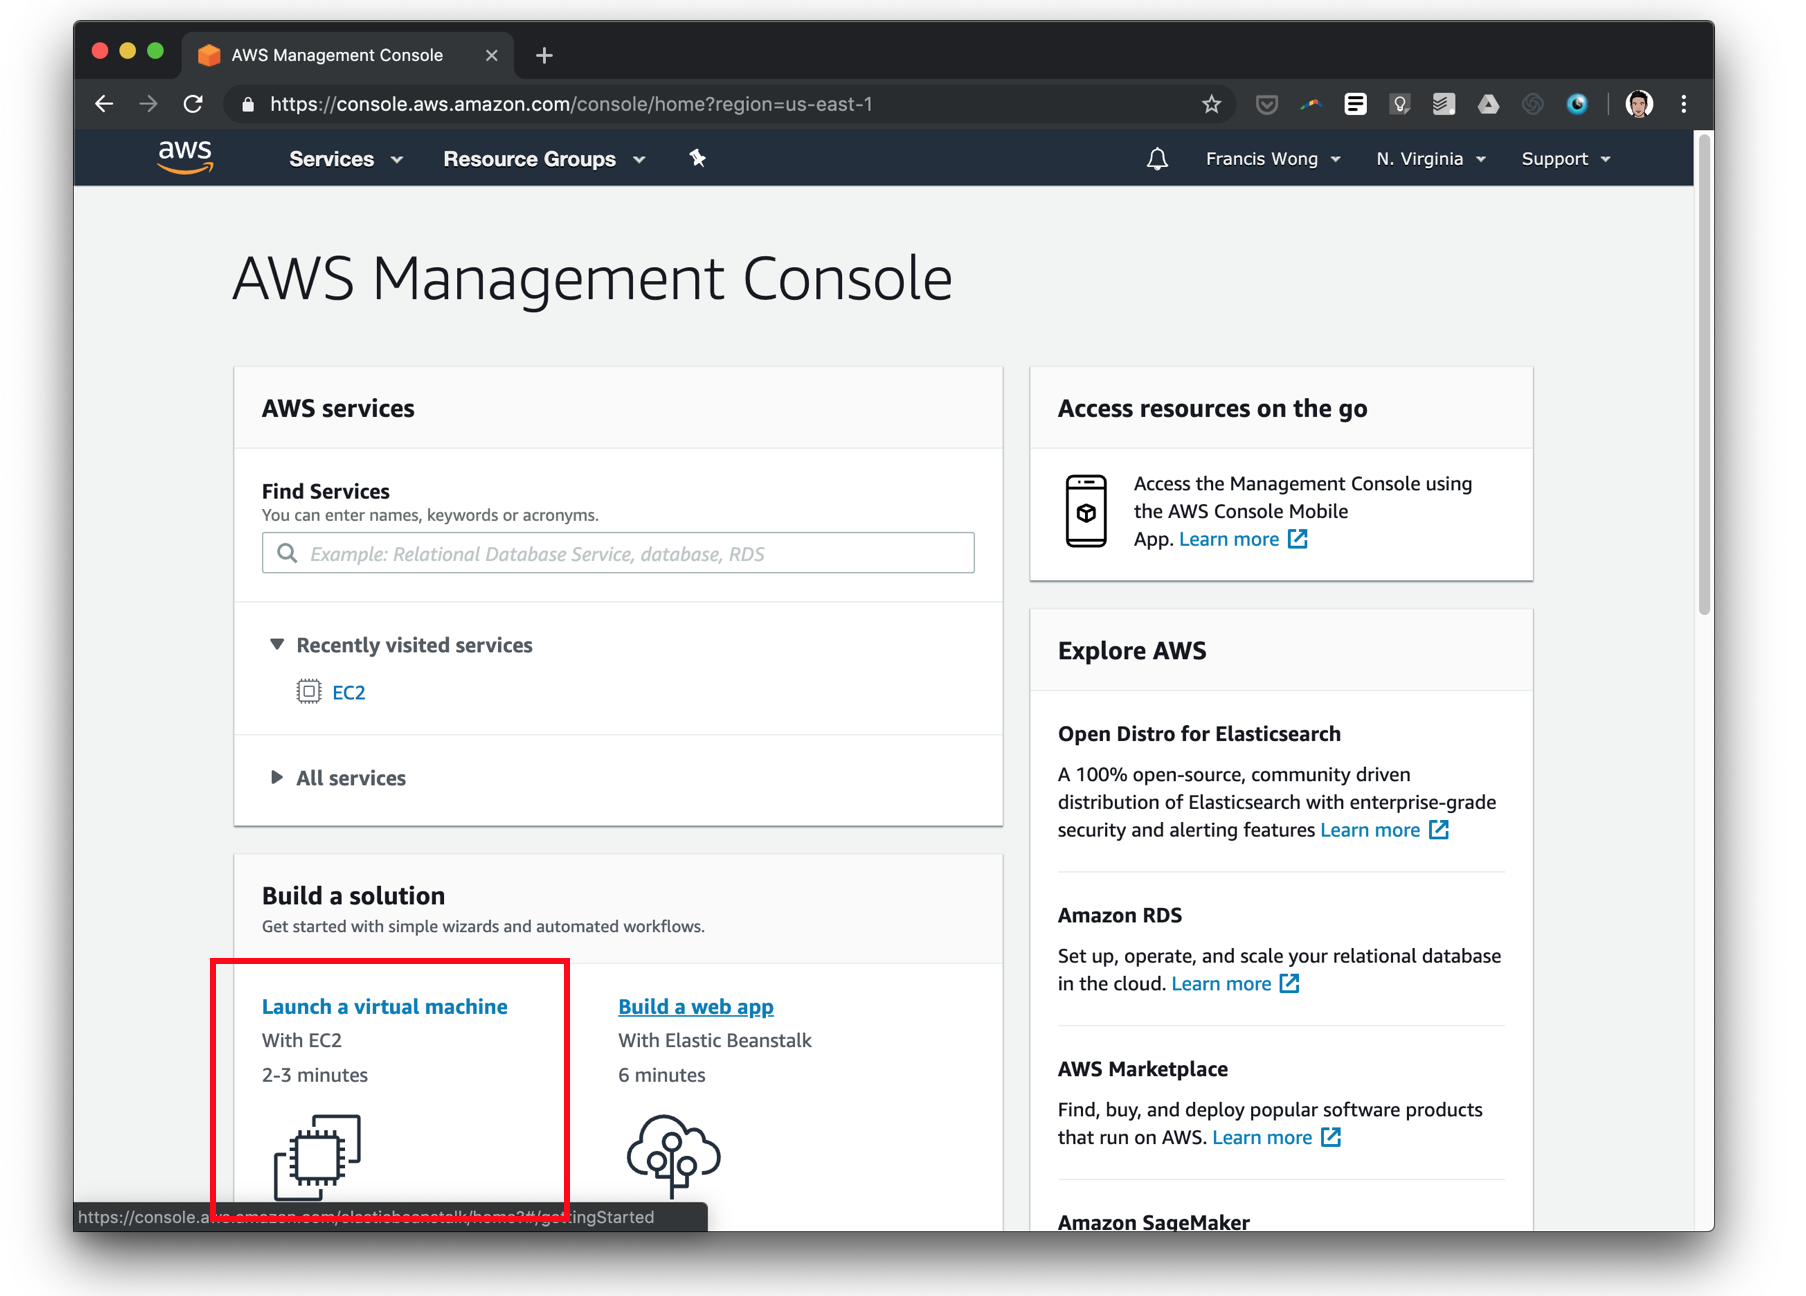
Then select “Launch a Virtual Machine with EC2”
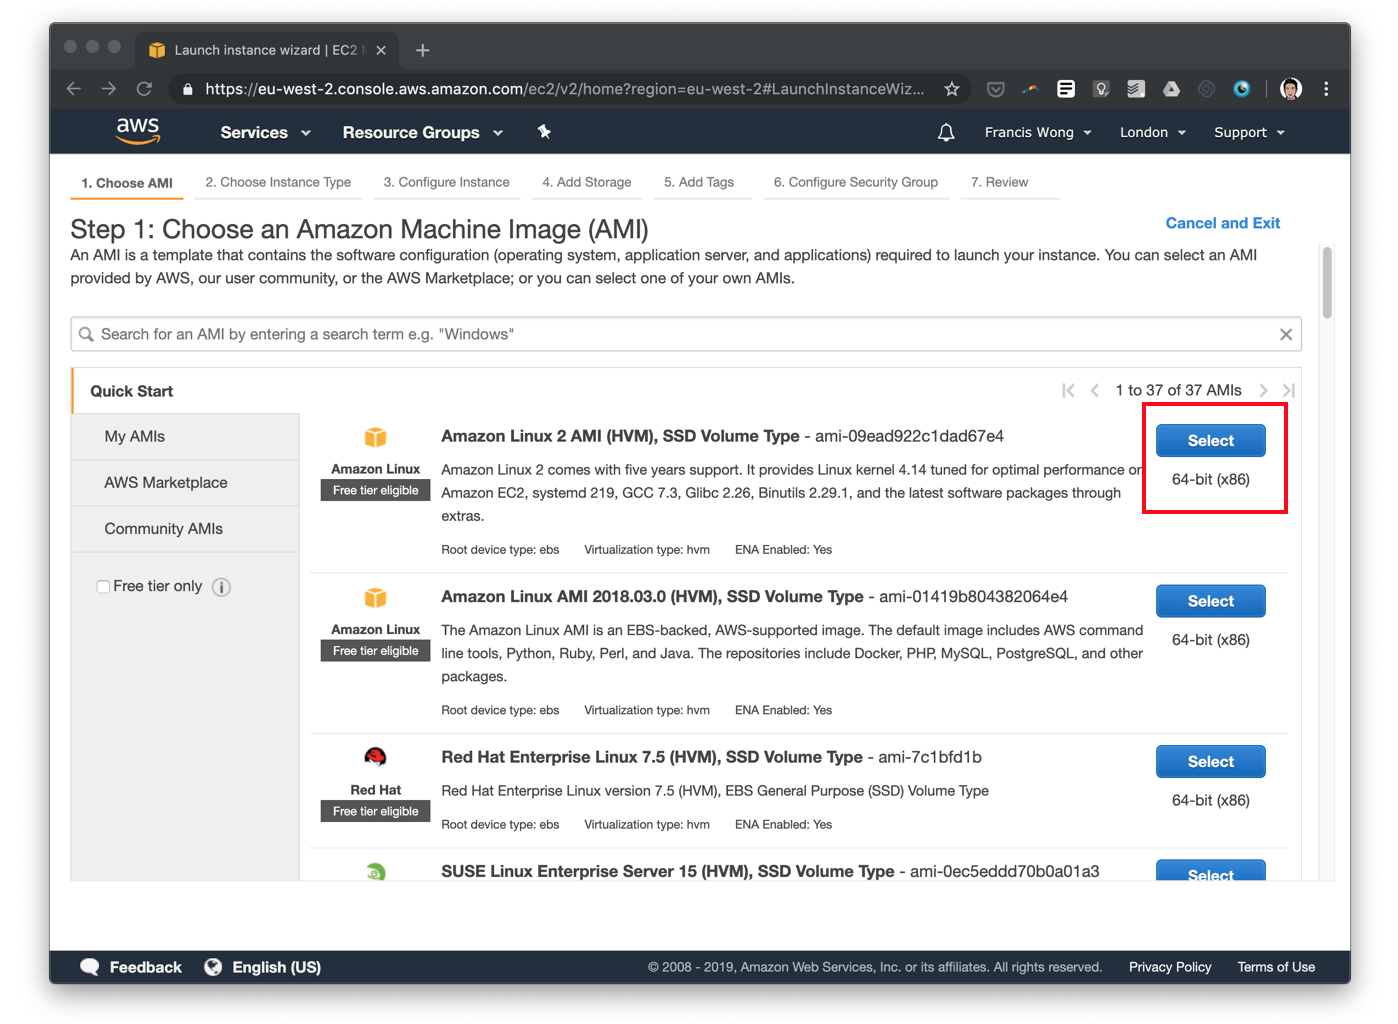
Now you get to choose the Linux distribution you want your virtual EC2 machine to run. For simplicity just select the top option, which is Amazon’s own distribution that is eligible for their free tier.
The next screen presents you a list of EC2 instance types, essentially how much compute power, RAM and network capacity your instance will have. For a personal VPN you really don’t need that much so go with the t2.micro option which is also free tier eligible. If you’re already an AWS customer you might consider a t2.nano which is a cheaper instance type.
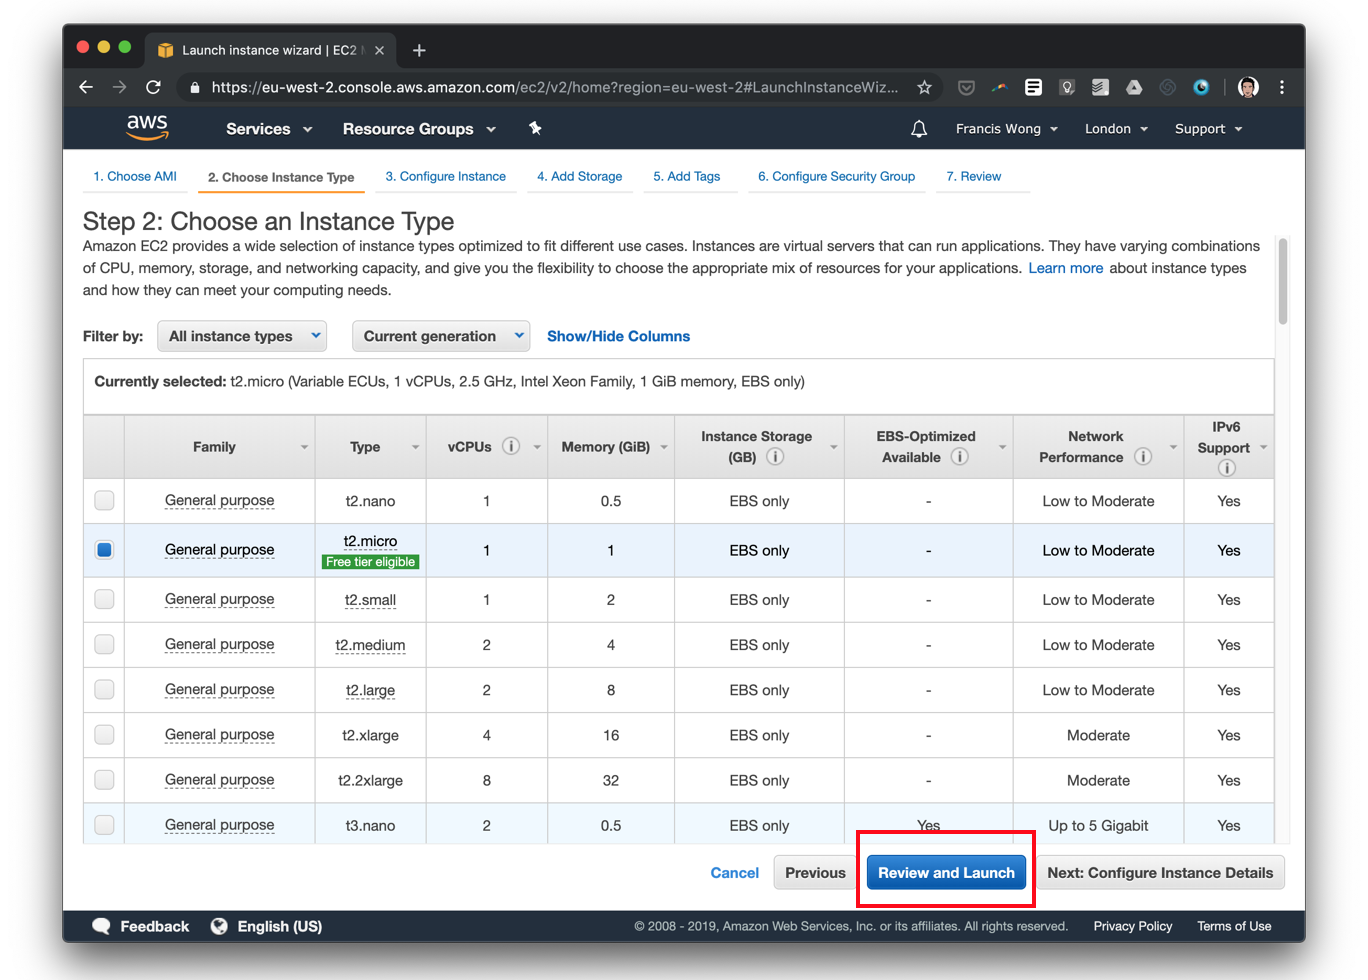
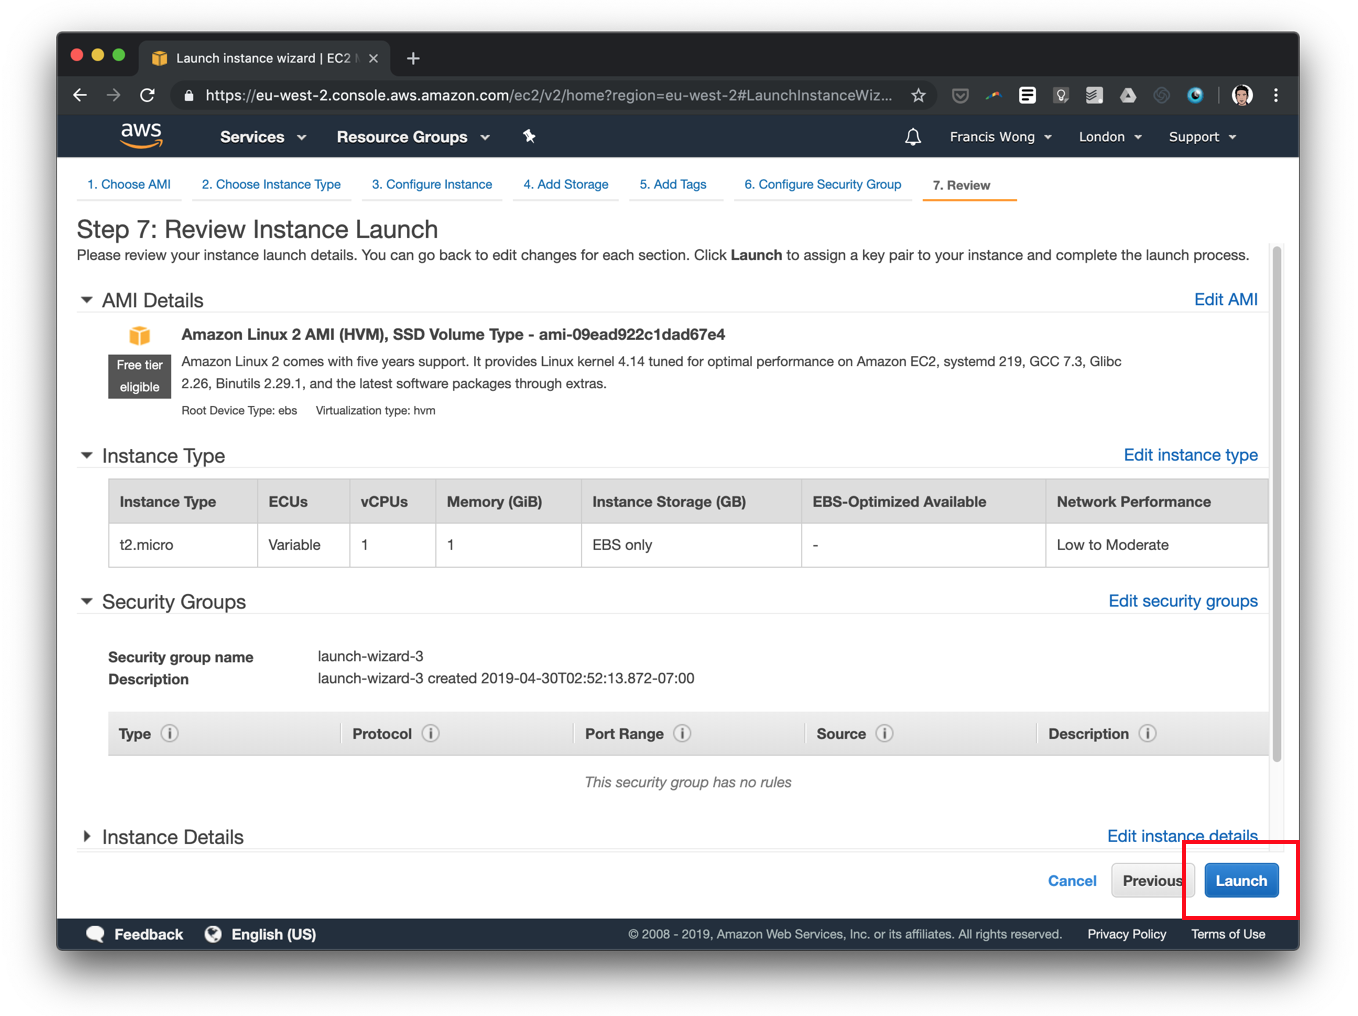
You can accept the default options and go ahead and click Launch.
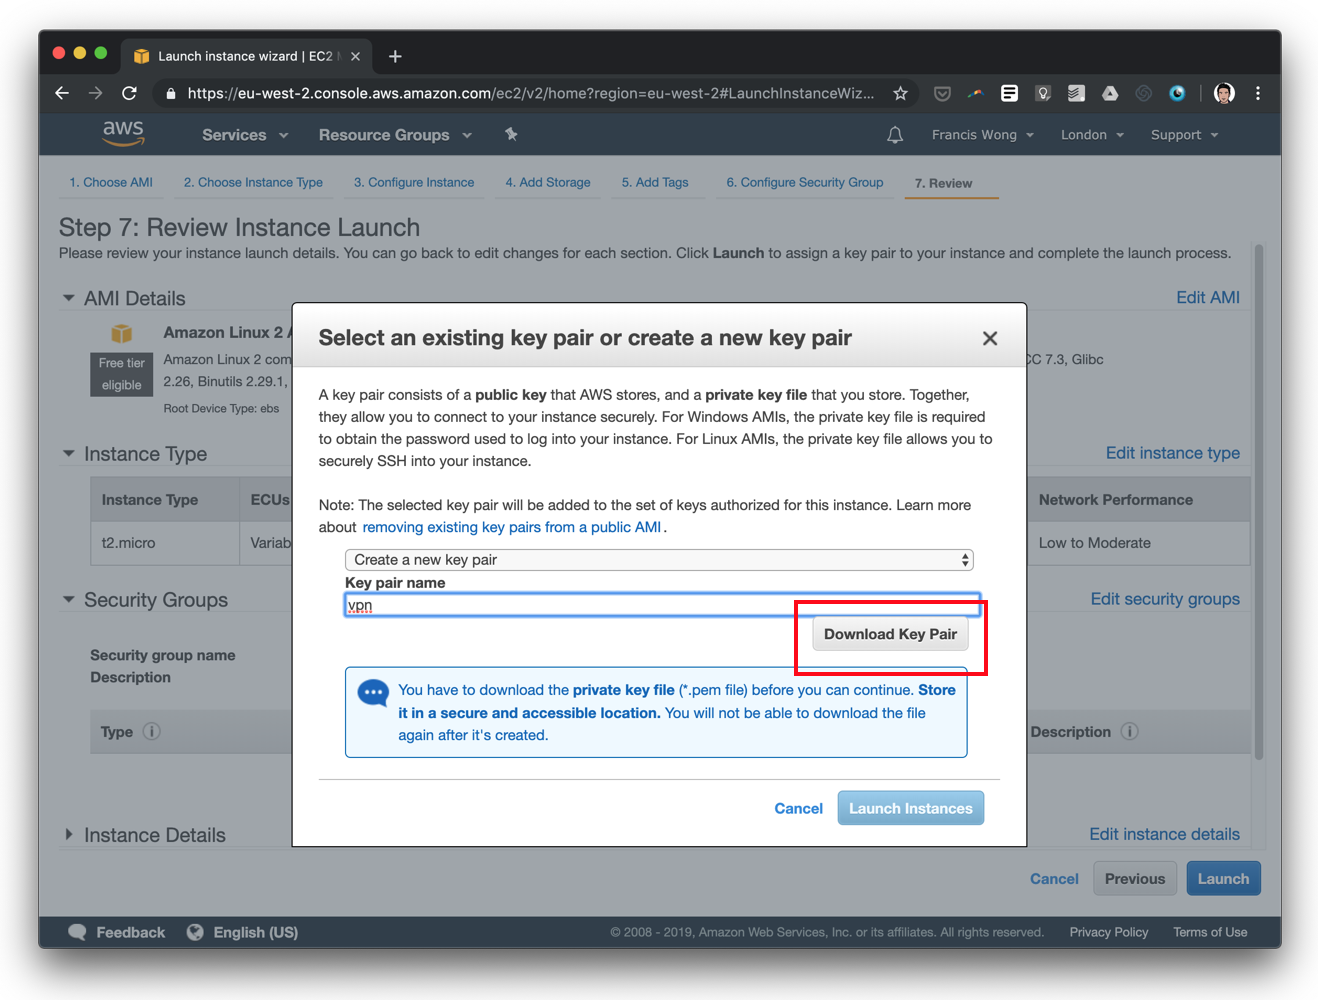
Now before it’s launched, you’ll need to create a new key pair. It’s like a virtual certificate stored in a file that lets you authenticate and will enable you to remotely access your server so you can install the VPN software. Click to download the key pair and then click Launch.
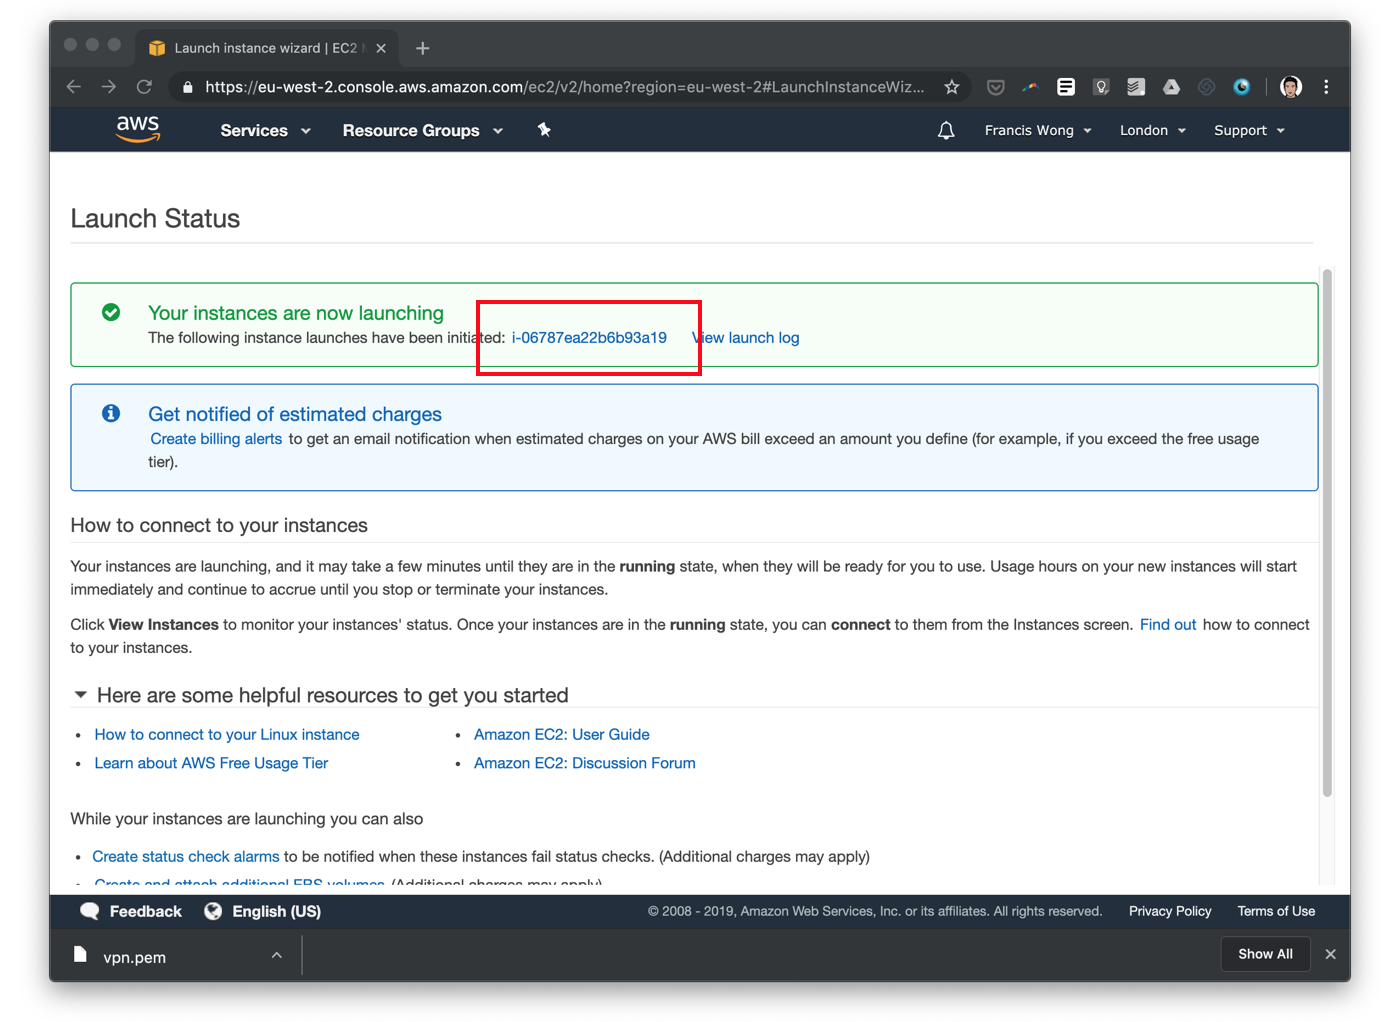
Your EC2 instance, essentially a virtual server, is now being provisioned. It takes a couple of minutes to get up and running. You can access its details and state by clicking on its unique reference or through the AWS EC2 dashboard (always make sure you’ve selected the right Availability Zone in the top right first).
Now you’ll see your instance. This one’s already up and running:

Now scroll to the right to find the column with the IPv4 Public IP (you can also see it in the description below). Take a note of that, as we’ll need the IP to connect to the server.
Now I’m going to assume you’re using a Mac here. If you’re not you’ll need to download an SSH client.
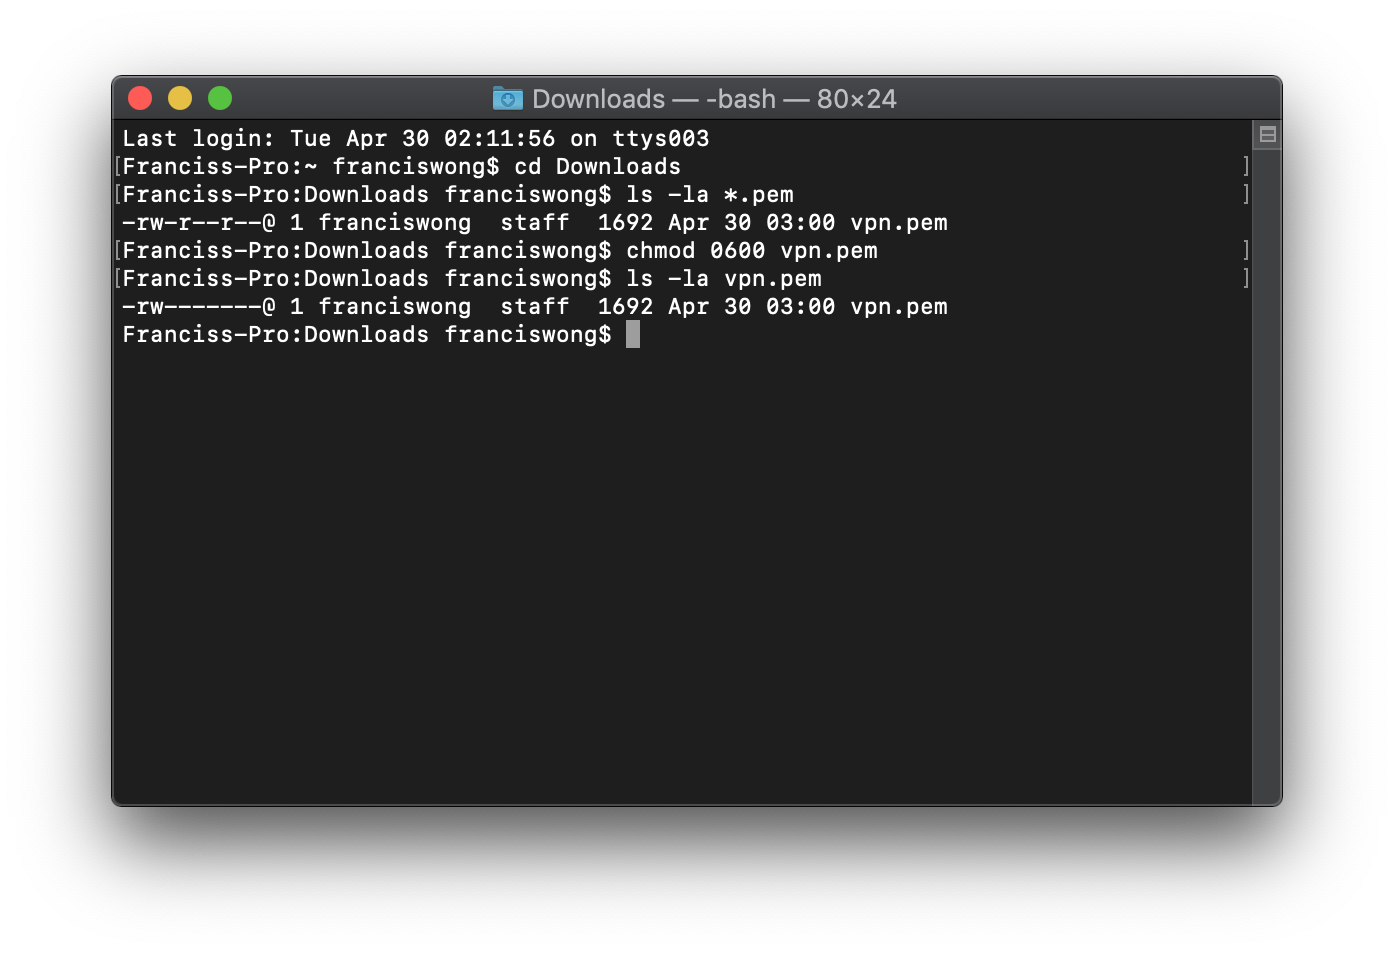
Go ahead and open “Terminal” (you can do this by opening Spotlight with ⌘ & Spacebar, then searching for Terminal). Once you’ve opened Terminal, go to the directory that you downloaded or moved your key pair to. In my case I’m just heading over to Downloads and with ls -la *.pem can see the permissions on the file. ssh requires that these files are only user readable for security so go ahead and change the permissions to 0600 by doing chmod 0600 vpn.pem. If you run ls -la *.pem you’ll see that the permissions denoted by the first few characters are now changed.
Now we’ll want to open up a remote terminal session to our new EC2 server using ssh. The Amazon Linux distribution has a default username of ec2-user without a password (the .pem file is your key). Substitute your .pem filename and the IP of your EC2 instance in as below:
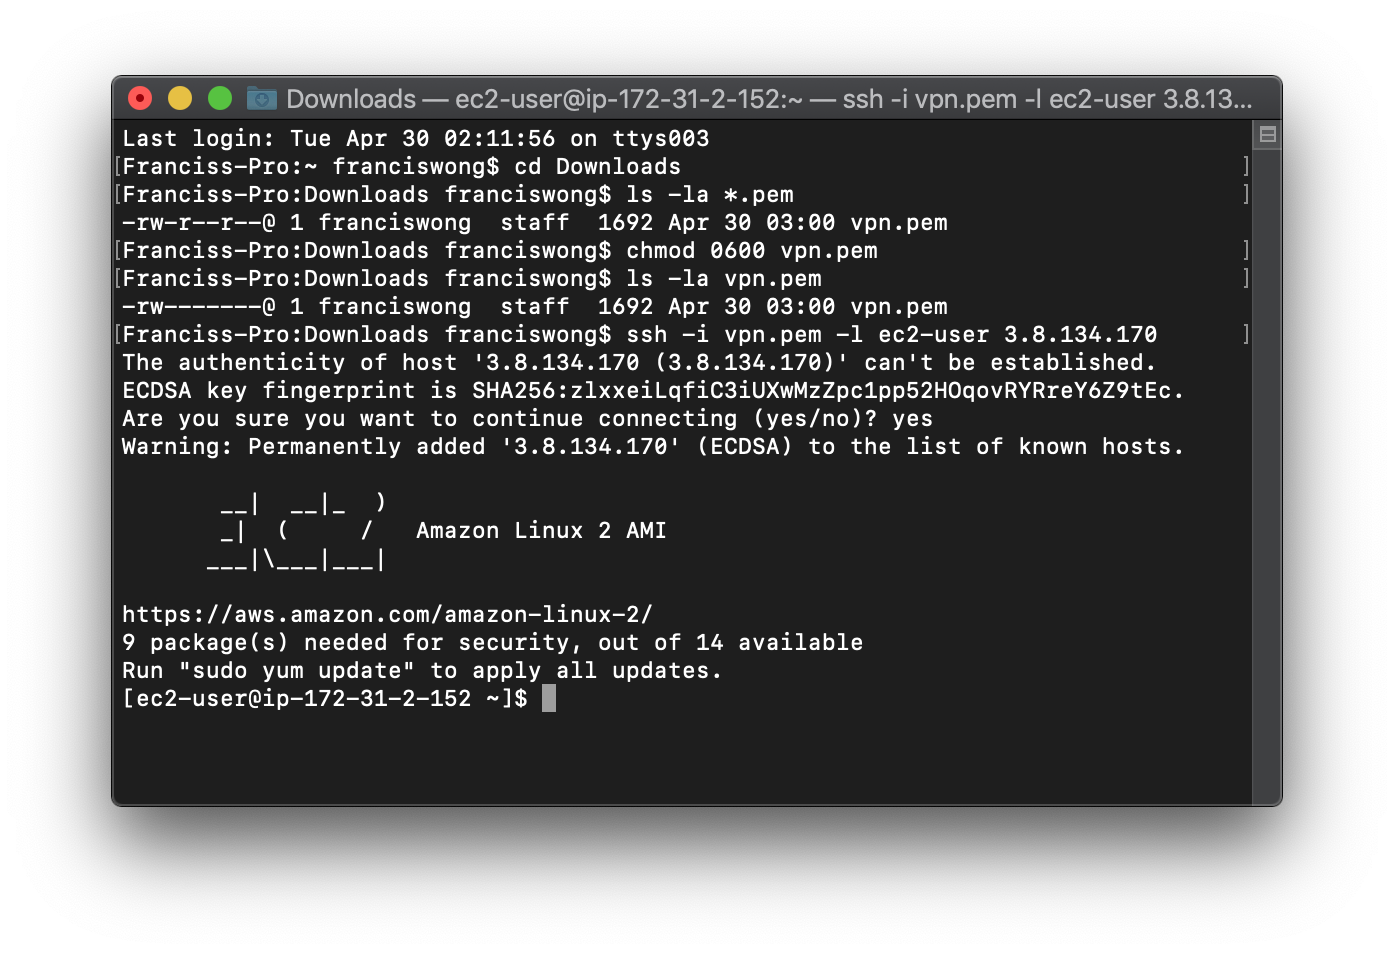
You’re now logged in to your EC2 instance! If you like you can go ahead and run the recommended security updates by typing in the command it suggests.
Installing the VPN server
We’re going to use a nifty set of scripts called Algo to set up the VPN server. It’s super easy! If you go to the above page it has the instructions for “Linux (deb-based)” which is what we’ll need to follow:
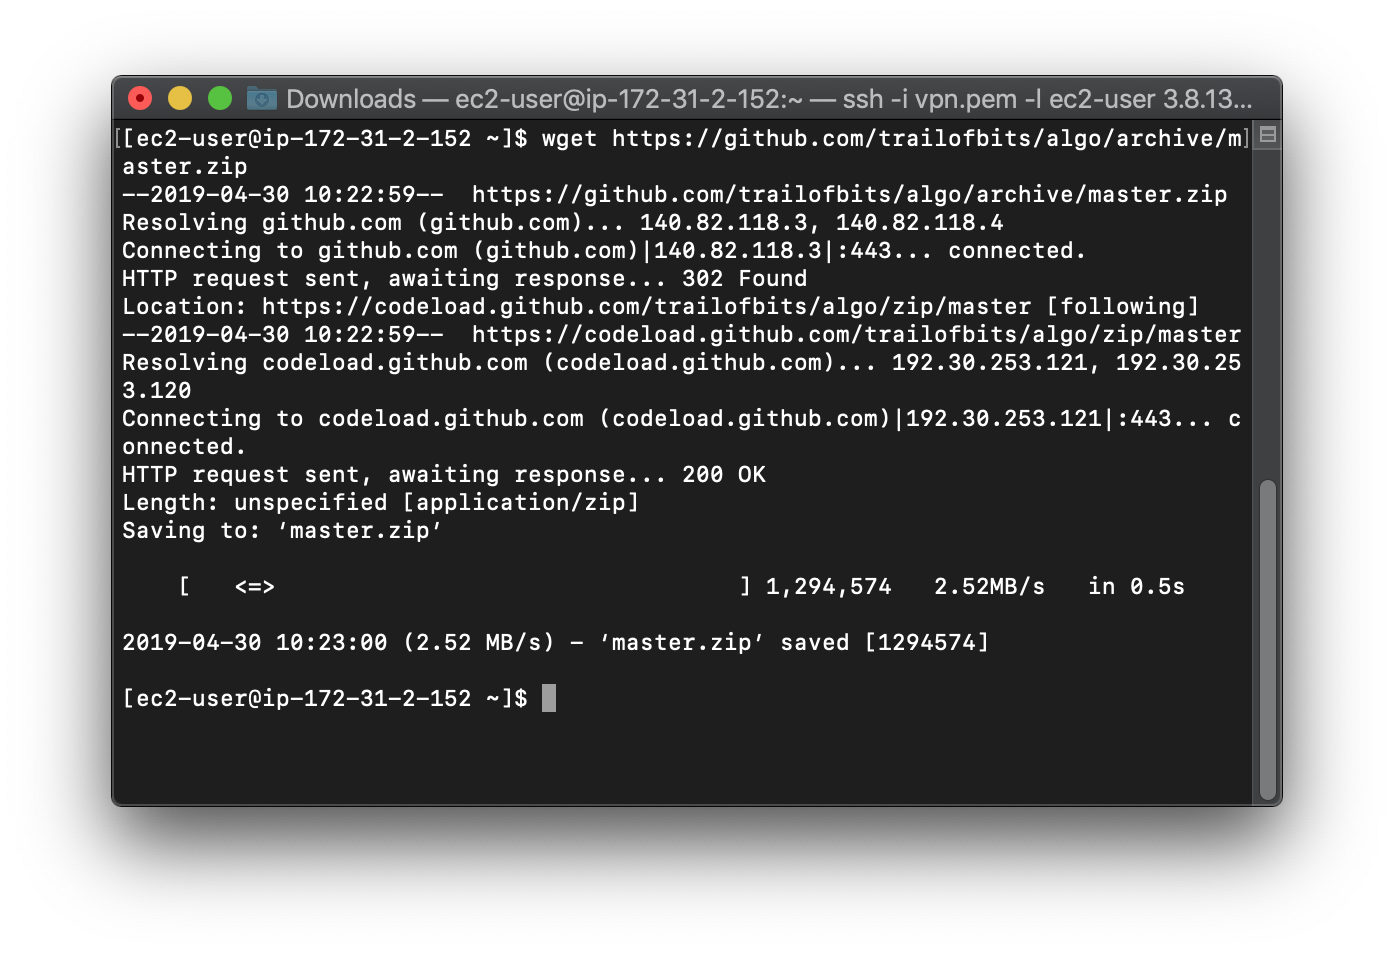
First of all, download Algo to your server using wget which should already be installed:
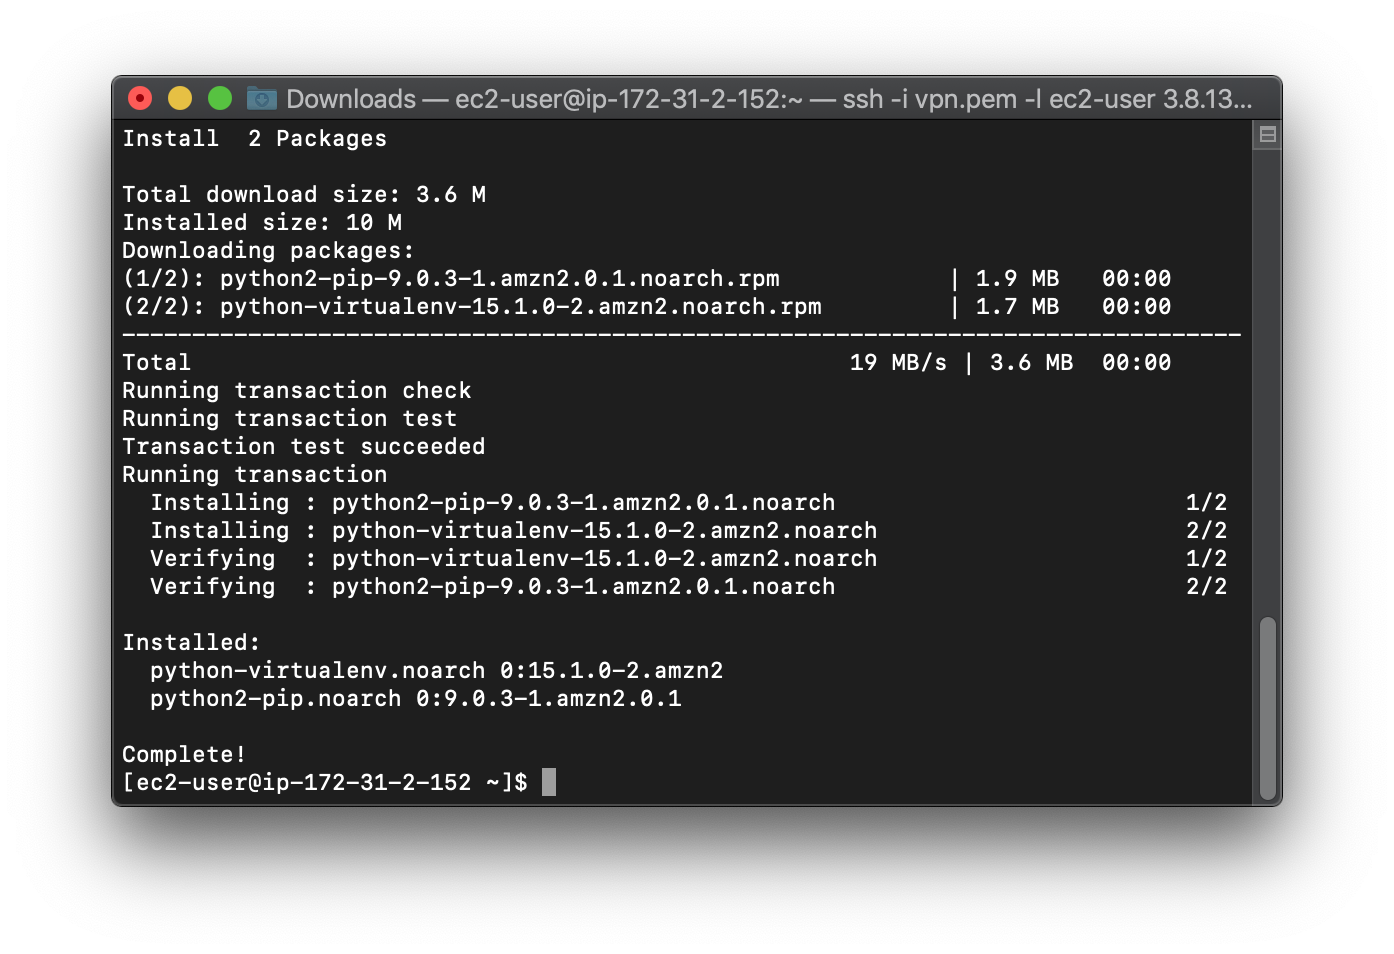
Now install the other packages that it needs to run (note that I changed apt-get to yum from the instructions as the Amazon distribution uses a different installer):
$ sudo yum update && sudo yum install \
    build-essential \
    libssl-dev \
    libffi-dev \
    python-dev \
    python-pip \
    python-setuptools \
    python-virtualenv -y
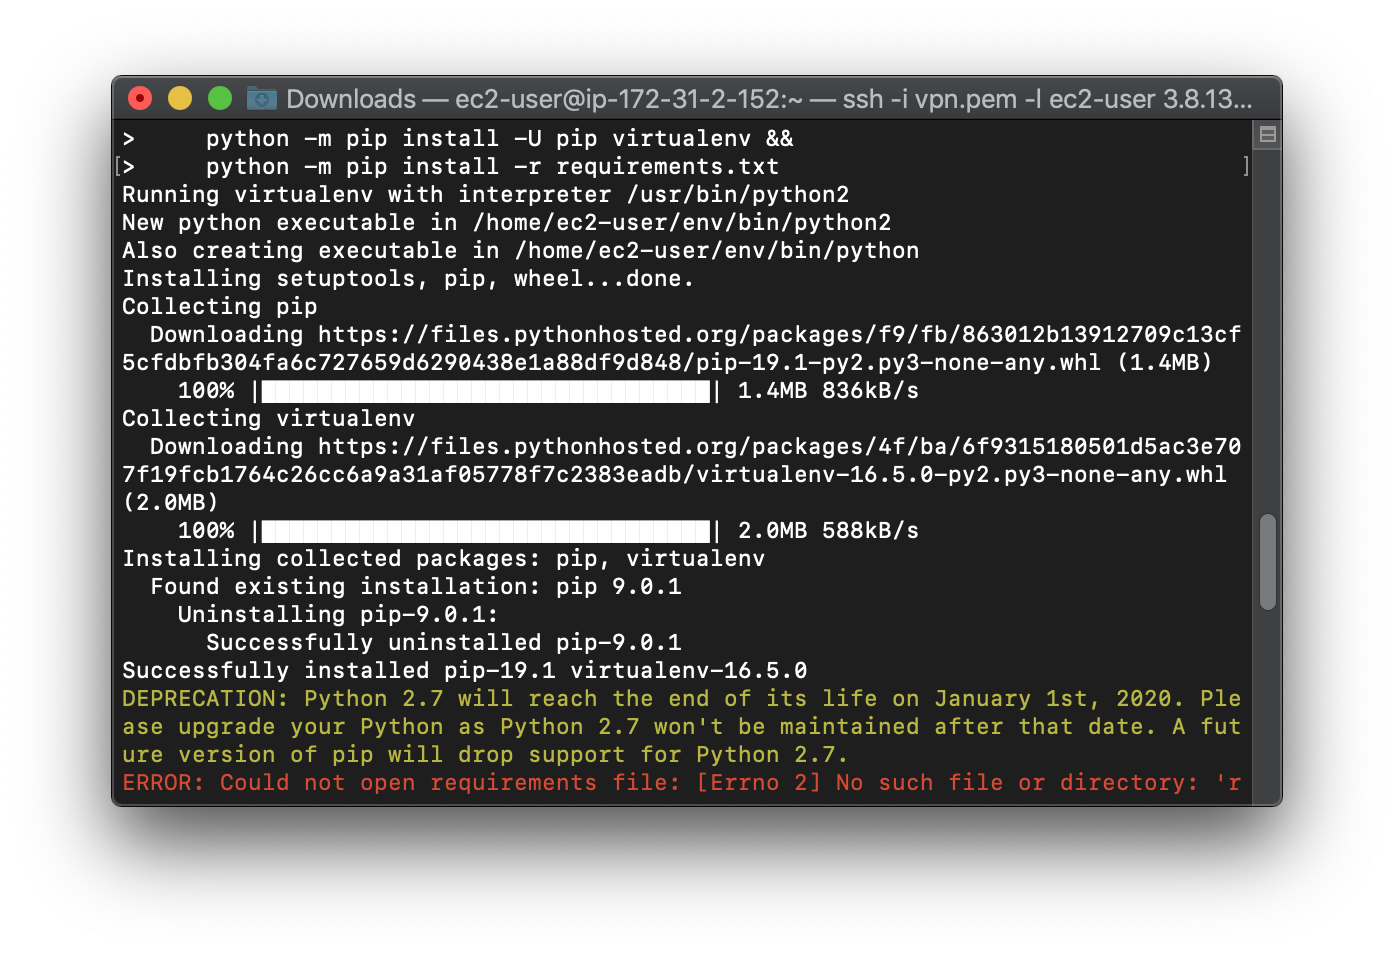
Now go ahead and install the other python dependencies. Don’t worry about the error messages.
$ python -m virtualenv --python=`which python2` env &&
    source env/bin/activate &&
    python -m pip install -U pip virtualenv &&
    python -m pip install -r requirements.txt
Now let’s unzip the Algo file using unzip -a master.zip. As you can see it unziped the contents to the algo-master directory:

Make sure you’re in the Algo directory eg. cd algo-master. Now you can edit the config file with nano config.cfg if you want to customize your users, the DNS servers your VPN uses or other more advanced settings. Before I could run ./algo I also needed to run sudo pip install ansible.
Once you run ./algo you’ll be taken through a series of questions to set up your VPN:
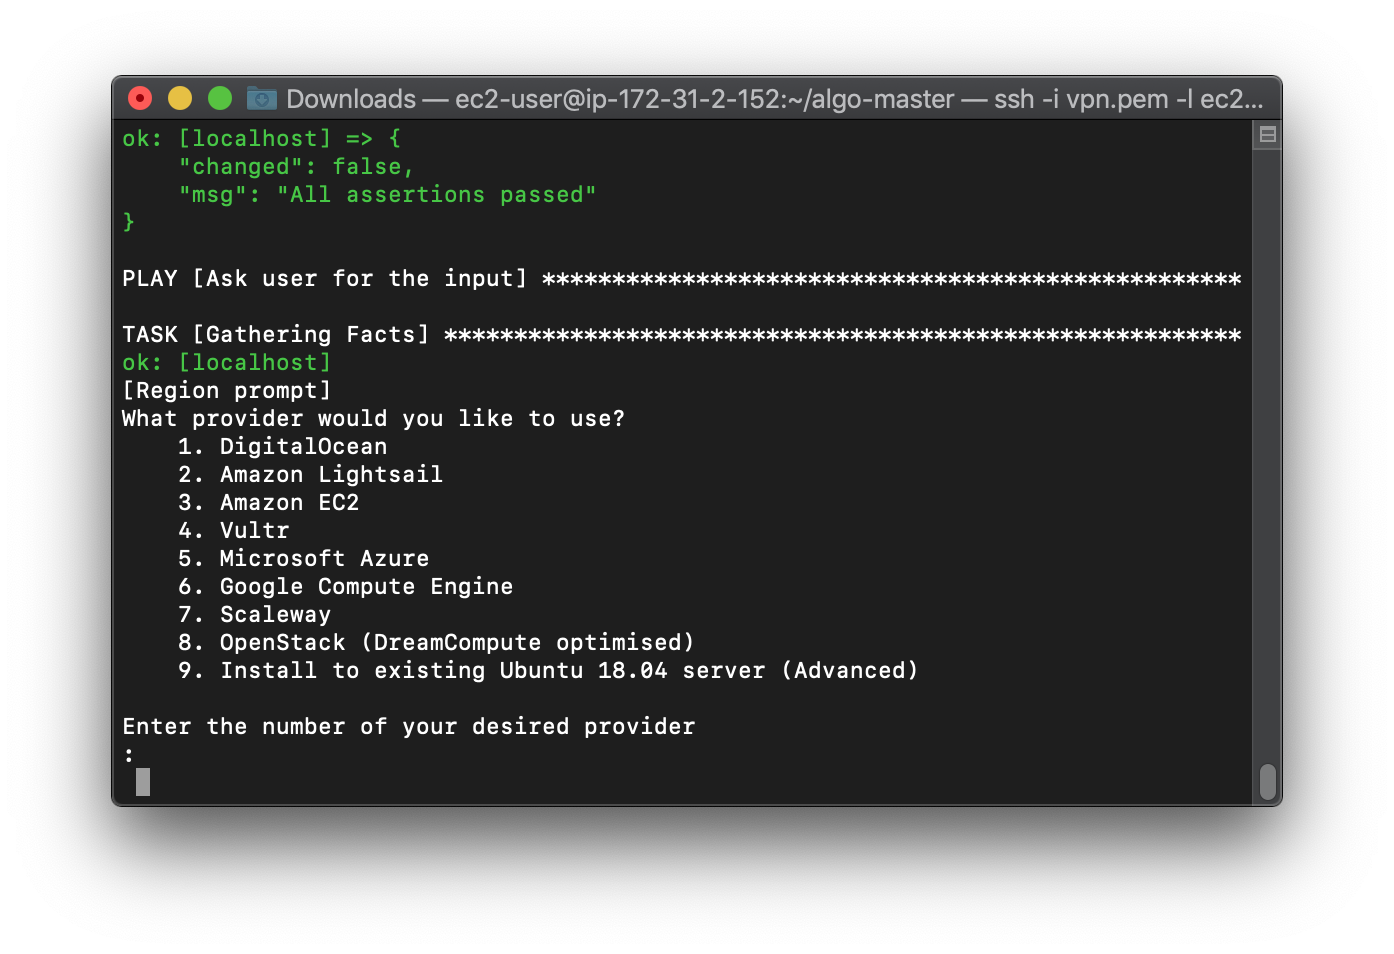
You can select the defaults for most of the options by just pressing enter. You’ll get to a promt that asks you for your aws_access_key. You’ll need to create a new one in your AWS console. Log back in to the AWS Management Console then click on your name in the top right, and select “My Security Credentials”. Then expand the “Access keys” section. You’ll see the option to “Create New Access Key” - click on it.
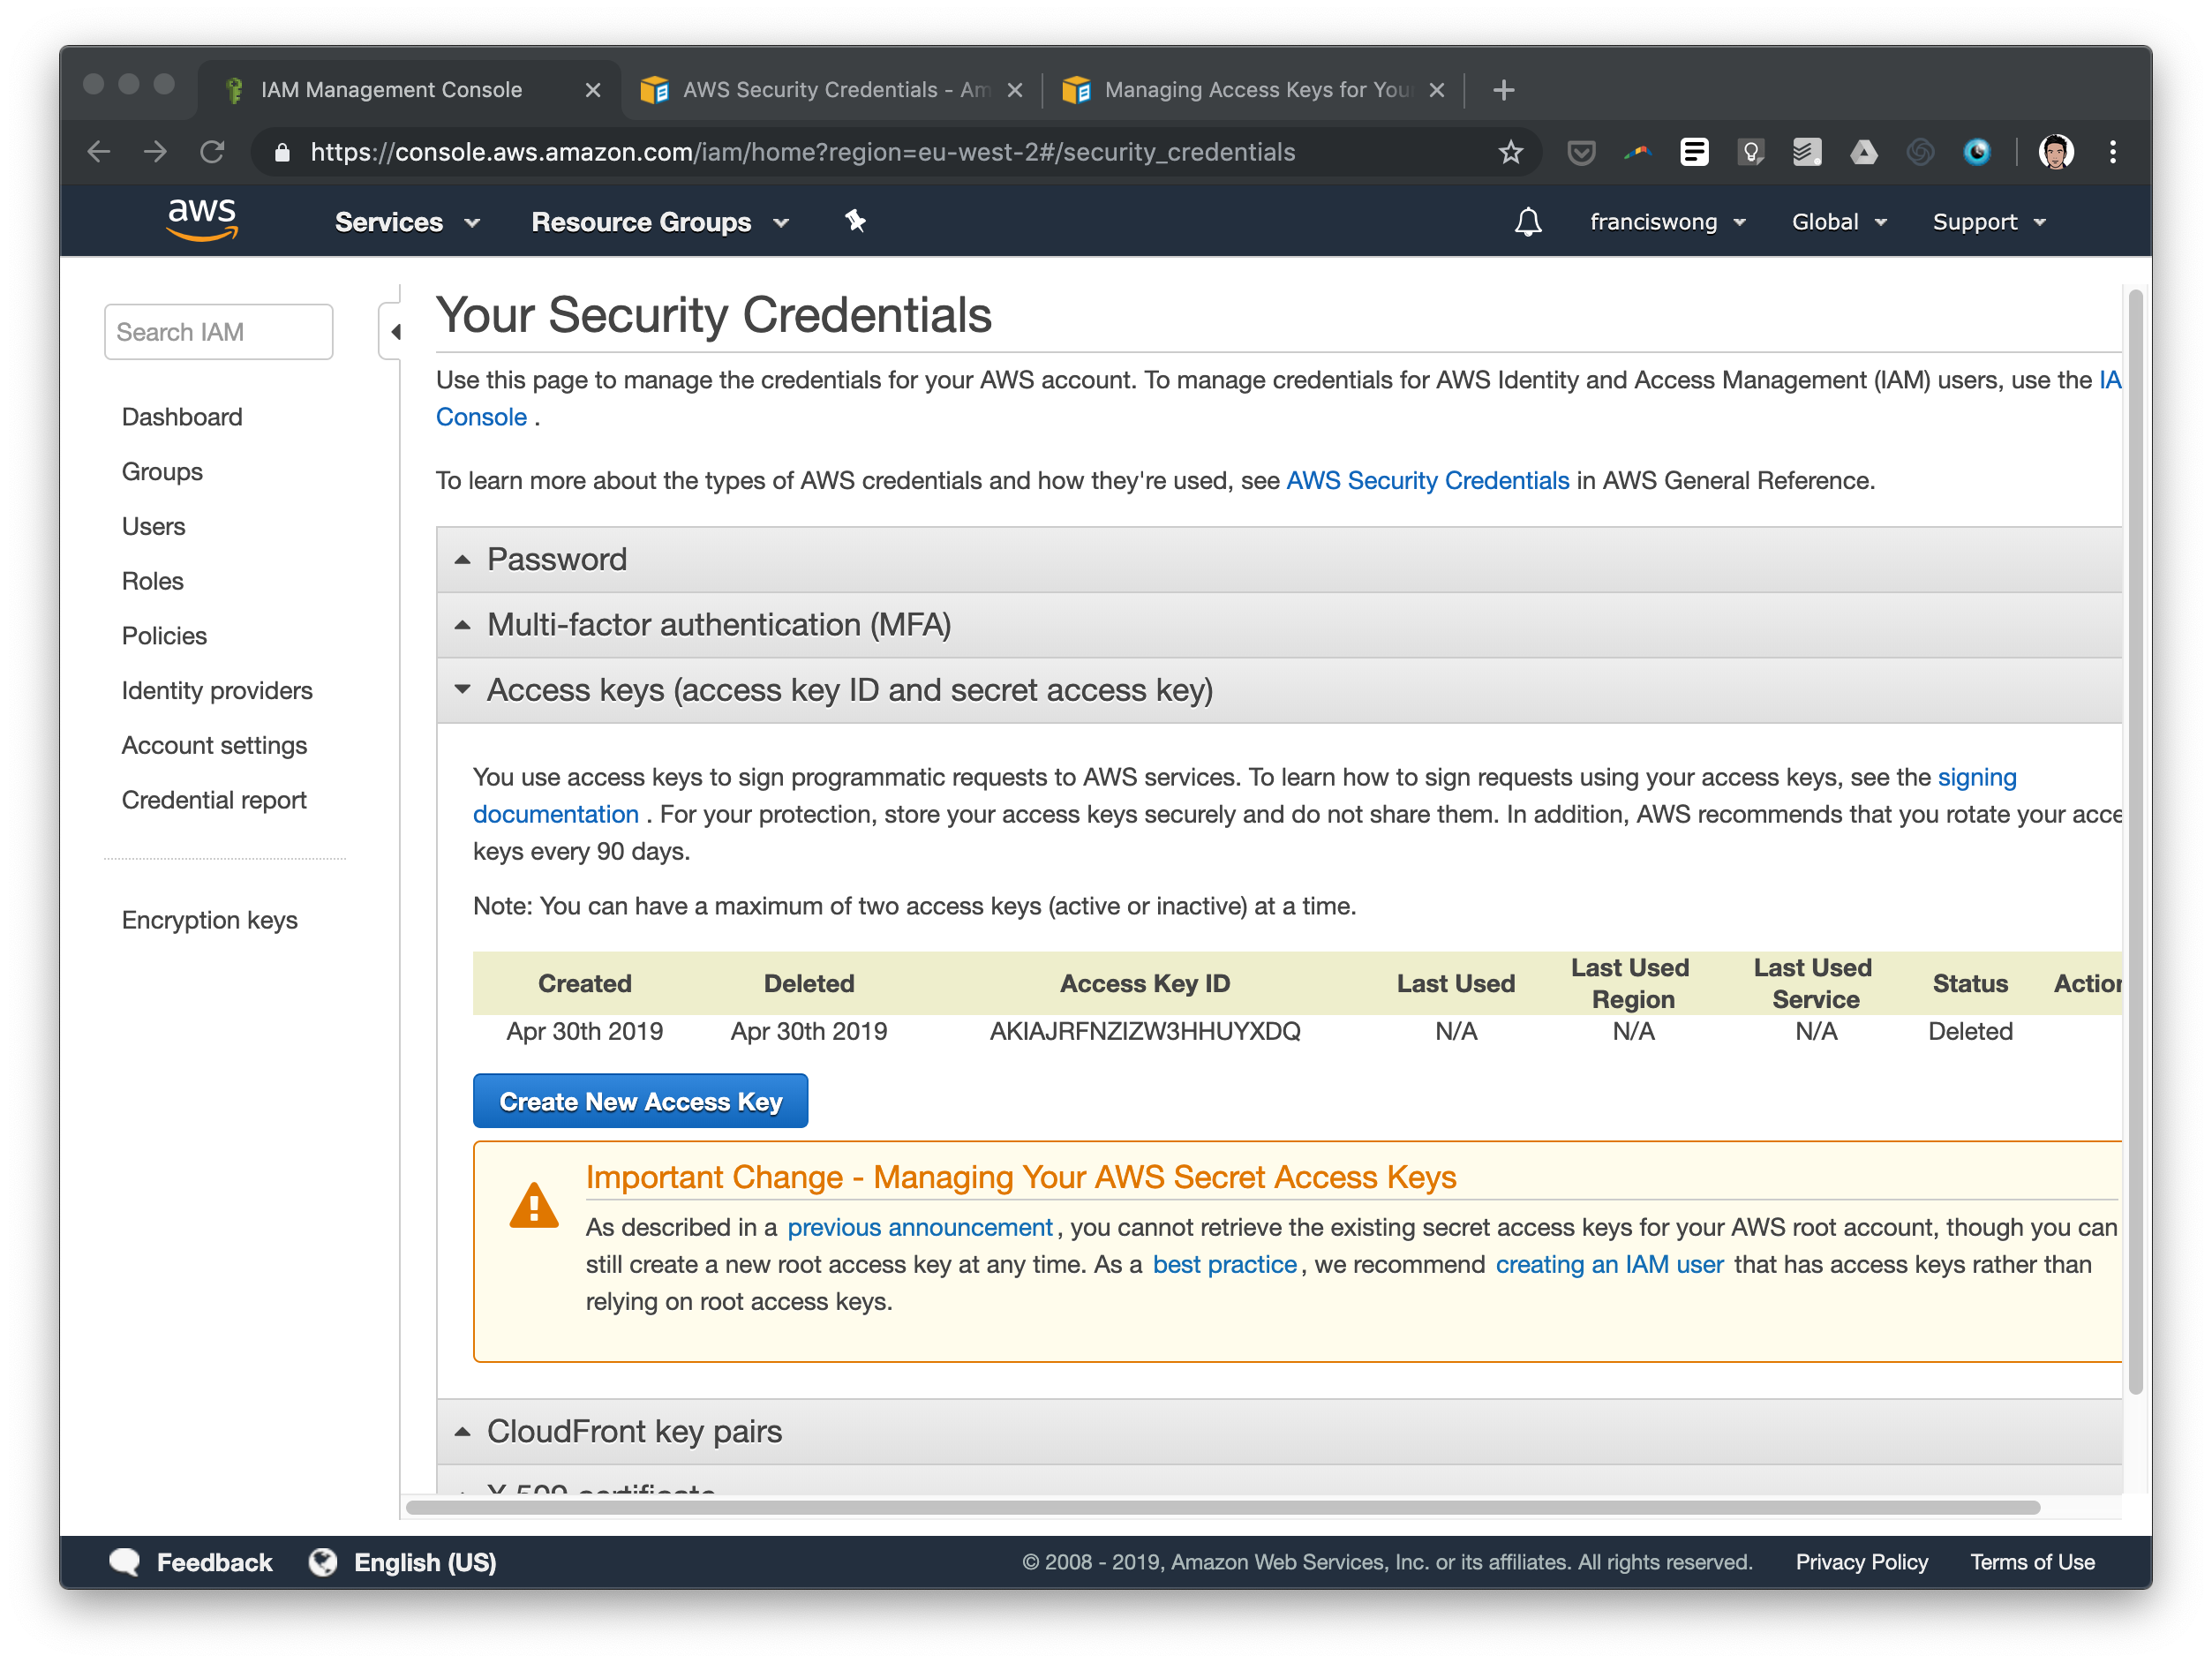
Next you’ll be presented with your new key. You only get to see and download this once, so make sure you don’t loose it (if you do you can always just create another one). Expand the secret access key and copy the string after “Access Key ID:” in to your terminal for your Algo installation.